As a Christmas present/French practice experiment, my friend and I took a 3 hour macaron-making class at Mmmmh, a local kitchen shop. It was great French practice, and we learned some good tips for making macarons. But then you have to take the next step and attempt to make them at home, with no professional pastry chef guiding you.
My friend already practiced – numerous times! – with great results. So I was jealous. So I decided to go ahead and try.
And I thought it would be a good idea to bring my first ever attempt at making macarons to another friend who grew up in Paris and regularly brings super fancy macarons from Paris when he comes over. Last time, there were dark chocolate foie gras filled macarons in the box. Super fancy. And super delicious.
So, no pressure on my first attempt, at all.
What I learned at my macaron-making class:
- Don’t try to do anything else in the kitchen while you are making macarons. They require immediate precision and your undivided attention.
- Get everything measured and ready before you start.
- Add the powdered sugar to the almond powder in your food processor when you grind it. Our teacher said that otherwise you may end up with marzipan. Which is a nice thing to have, but won’t help you in your macaron-making quest.
- When you pipe the macarons, our teacher said you should squeeze-squeeze-squeeze (3 seconds), stop, then lift. If you lift immediately, you’ll end up with funky looking macarons. Make sure the pastry bag is perpendicular to the baking sheet. And hold the tip unbelievably close to the baking sheet; by the time you’ve piped your macaron, the tip of your tip should be inside the batter.
- After they are done baking and you are matching and assembling your macarons, only hold them from the sides.
- When the recipe says to thump the baking sheet on the counter a few times, they aren’t joking. That’s how you get the air bubbles out and smooth the tops to the beautiful round shape we know and love.
- The main reason macarons are colored is to hide the specks of almond powder in the batter.
- Although at the class they used baking sheets that have a rim, I would definitely say use a baking sheet with no edge. Much easier to move the parchment paper with freshly piped macaron shells from your template to whatever pan you’ll bake it on.
What I learned making macarons from start to finish:
- My two candy thermometers show different temperatures. This is probably why the toffee I made at Christmas time failed to miserably. It will hopefully also be the reason I am able to convince my husband I need the fancy candy thermometer the Bouchon Bakery recommends I use…
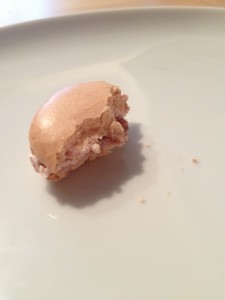
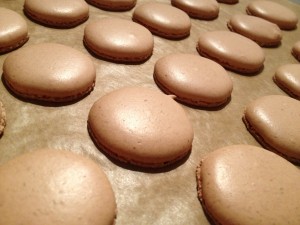
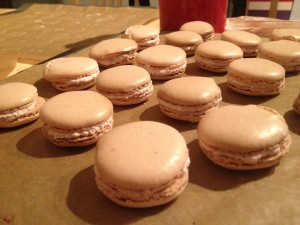
- More food coloring is not a bad thing. I went for red macarons (Valentine’s day and all), and although the batter looked pretty intensely pink, the baked macarons looked just slightly pinky-tan.
- When the recipe says I may not use all of my egg whites, the recipe is right. I added too many and my batter was too loose. They still turned out okay, but it was harder to pipe them.
- Invest in a plain tip for my big pastry bag. I only had a star tip and although the vague star shape disappeared after the baking sheet got thumped, it was disconcerting as I was piping.
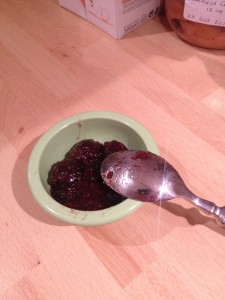
- Jam inside a macaron makes it brunch food. Cuz it has jam in it! I thought the 50 grams of raspberry jam didn’t give the buttercream enough of a raspberry kick, so I followed their recommendation to do a “bull’s eye”: pipe a circle of buttercream and then a dot of jam in the middle of each macaron. A flavor pop, for sure!
Although it was my first attempt – ever! Although you are actually supposed to freeze macarons for at least 24 hours before serving them. Although the buttercream started to melt in my hot little hands as I was piping it. Although we had to transport them in a tupperware on the bus and a 10 minute walk.
Despite all of these factors, my macaron-connoisseur friend had only positive things to say about them. Well, he did say that he would like lemon curd in future attempts. But they were most definitely, absolutely, a big hit.
I’m already planning different flavor combinations and fillings for future batches… And I am accepting suggestions/recommendations/requests…
Raspberry Macarons
From Bouchon Bakery
Yield: makes 14 macarons (I used a smaller circle – around 3 cm diameter – and made more than 60 macarons)
Ingredients:
Macarons
212 grams (1 3/4 cups + 2 1/2 tablespoons) almond flour/meal
212 grams (1 3/4 cup + 1 tablespoon + 2 teaspoons) powdered sugar
82 grams (1/4 cup + 1 1/2 tablespoons) egg whites
90 grams (1/4 cup + 2 tablespoons) egg whites
236 grams (1 cup + 3 tablespoons) granulated sugar, plus a pinch for the egg whites
158 grams (2/3 cup) water
Raspberry Buttercream
75 grams (1/4 cup + 1 tablespoon) egg whites
150 grams (3/4 cup) granulated sugar
33 grams (2 tablespoons + 2 1/4 teaspoons) granulated sugar
42 grams (3 tablespoons + 1 teaspoon) water
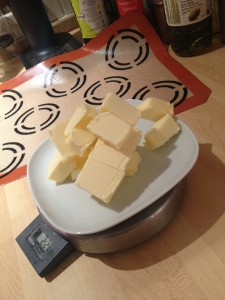
227 grams (8 ounces) unsalted butter, cut into 1/2-inch pieces, at room temperature
50 grams (2 tablespoons) raspberry jam
80 grams (3 1/2 tablespoons) raspberry jam, for bull’s eye filling
Directions:
For the macarons:
Because the cookies will be sandwiched, it is important that they be as close in size as possible. Even if you are proficient with a pastry bag, we suggest making a template, as we do. Use a compass or a cookie cutter as a guide and a dark marking pen, such as a fine-tip Sharpie.
Lay a sheet of parchment paper on the work surface with a long side closest to you. Trace 4 evenly spaced 2 1/4-inch circles along the top long edge, leaving 1 inch of space around them. Trace 3 circles below them, spacing them between the first circles. Continue with another row of 4, following by another row of 3. Turn the parchment over and lay it on a sheet pan. Lift up each corner of the parchment and spray the underside with nonstick spray to keep it from blowing up while the cookies are baking. Repeat with a second sheet pan and piece of parchment paper.
Preheat the oven to 350F (convection) or 400F (standard).
Place the almond flour in a food processor (with the powdered sugar) and pulse to grind it as fine as possible.
Sift the almond flour and powdered sugar into a large bowl and whisk together. (In my class, we repeated this step as many times as necessary until the almond flour was fine enough to go through the sifter so we didn’t have big specks in our cookies.) Mound the almost flour mixture, then make a 4-inch well in the center, leaving a layer of flour at the bottom. Pour in the 82 grams eggs whites and combine with a spatula. Set aside.
Place the remaining 90 grams egg whites in the bowl of a stand mixer fitted with the whisk attachment. Combine the 236 grams granulated sugar and the water in a small saucepan and heat over medium-high heat until the syrup reaches 203F/110C.
Letting the syrup continue to cook, add the pinch of sugar to the egg whites, turn the mixer to medium speed, and whip to soft peaks. If the whites reach soft peaks before the syrup reaches 248F/120C, reduce the speed to the lowest setting, just to keep them moving.
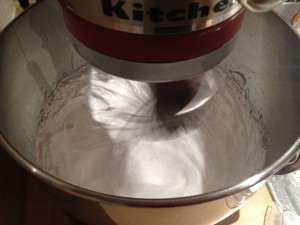
When the syrup reaches 248F/120C, remove the pan from the heat. Turn the mixer to medium-low speed, and slowly add the syrup, pouring it between the side of the bowl and the whisk; the meringue will deflate. Increase the speed to medium and whip for 5 minutes, or until the whites hold stiff, glossy peaks. Although the bowl will still be warm to the touch, the meringue should have cooled; if not, continue to whip until it is cool.
Fold one-third of the meringue into the almond mixture, then continue adding the egg whites a little at a time (you may not use them all) until when you fold a portion of the batter over on itself, the “ribbon” slowly moves. The mixture shouldn’t be so stiff that it holds its shape without moving at all, but it shouldn’t be so loose that it dissolves into itself and does not maintain the ribbon; it is better for the mixture to be slightly stiff than too loose.
Fold 3 to 4 drops pink food coloring into the finished meringue mixture.
Transfer the mixture to the pastry bag with the 1/2-inch tip. Hold the bag upright 1/2 inch above the center of one of the traced circles and pipe out enough of the mixture to fill in the circle. Lift away the pastry bag and fill the remaining circles on the first pan. Lift up the sheet pan and tap the bottom of the pan to spread the batter evenly and smooth any peaks left by the pastry bag.
If using a convection oven, bake for 8 to 10 minutes, until the tops are shiny and crisp. If using a standard oven, place the sheet pan in the oven, immediately lower the oven temperature to 325F, and bake for 9 to 12 minutes, until the tops are shiny and crisp. Set the pan on a cooling rack and cool completely. If using a standard oven, preheat it to 350F again.
Pipe the remaining meringue mixture into the circles on the second sheet pan and bake as directed above. Let cool completely.
For the buttercream filling:
Place the egg whites in the bowl of a stand mixer fitted with the whisk attachment.
Place the 150 grams sugar in a small saucepan, add the water, and stir to moisten the sugar. Bring to a simmer over medium-high heat, stirring occasionally, and simmer until the syrup reaches 230F/100C.
Letting the syrup continue to cook, turn the mixer to medium speed, gradually pour in the remaining 33 grams sugar into the whites, and whip until the whites are beginning to form very loose peaks. If the whites are ready before the syrup reaches 248F/120C, turn the mixer to the lowest setting just to keep them moving.
When the syrup reaches 248F/120C, remove the pan from the heat. Turn the mixer to medium-low speed and slowly add the syrup to the whites, pouring it between the side of the bowl and the whisk. Increase the speed to medium-high and whisk for 15 minutes, or until the bottom of the bowl is at room temperature and the whites hold stiff peaks. (If the mixture is warm, it will melt the butter.)
Reduce the speed to medium and add the butter, a few pieces at a time. If at any point the mixture looks broken, increase the speed and beat to re-emulsify it, then reduce the speed and continue adding the butter. Add 50 grams raspberry jam and mix for 1 minute, or until evenly combined. Check the consistency: if the buttercream is too loose to hold its shape, it should be refrigerated for up to a few hours to harden, then beaten again to return it to the proper consistency.
The buttercream can be stored in a covered container in the refrigerator for up to 5 days or frozen for up to 1 month; defrost frozen buttercream in the refrigerator overnight before using. Thirty minutes before using the buttercream, place it in the bowl of a mixer fitted with the paddle attachment and allow to soften. Then mix on low speed to return the buttercream to the proper consistency for piping or spreading.
To fill the cookies:
Transfer the buttercream to the pastry bag with the 3/8-inch tip.
Remove the macarons from the parchment paper. Turn half of them over. Starting in the center, pipe 15 grams of the buttercream in a spiral pattern on one upside-down macaron, not quite reaching the edges. Top with a second macaron and press gently to spread the buttercream to the edges. Repeat with the remaining macarons and filling.
If you are adding a jam center, pipe buttercream around the edge of each bottom macaron and then place a small amount of curd or jam in the center of each.
The macarons are best if wrapped individually in a few layers of plastic wrap and frozen for at least 24 hours or up to 2 weeks. Defrost in the refrigerator for 3 hours, then bring to room temperature before serving. They can be served the day they are made or stored in a covered container in the refrigerator for up to 2 days.

